OxaPayBlog: Insight on Crypto Payment Gateways

Crypto Payment Integration Checklist with API for Websites

Cloud-shaped gear mechanism representing crypto API integration

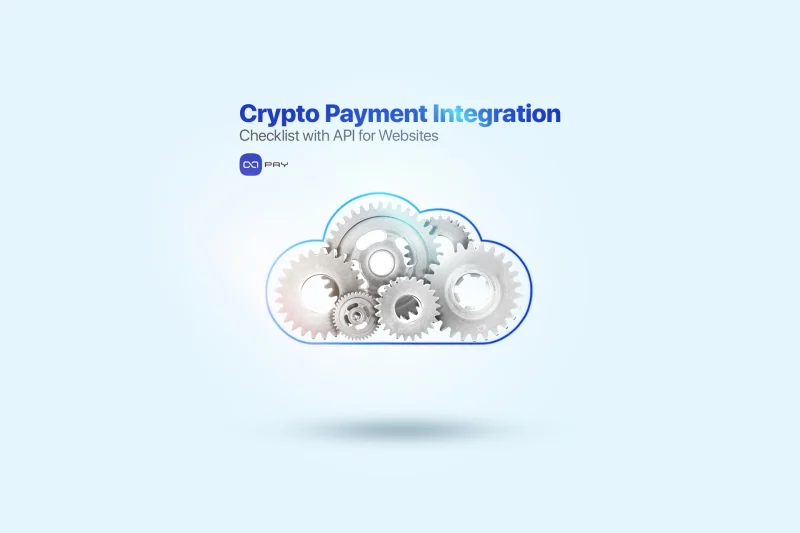
Planning a crypto payment integration for your website using API?
This checklist is designed for businesses and development teams aiming to implement a crypto payment integration using OxaPay’s API-based system efficiently. Whether you’re building a custom solution or managing a team of developers, this step-by-step guide outlines all key decisions, configurations, and operational checks—without diving into code. From setting up your account and generating API keys to choosing the right payment method and ensuring proper security, this checklist helps you confidently launch and manage crypto payments using OxaPay.


Create and Secure Your OxaPay Account

To start accepting crypto payments, the first step is to create a secure OxaPay account for your business or team. OxaPay lets you get started immediately—with no KYC or KYB required.

Setup Checklist:

Sign up at oxapay using your email, Google account, or Telegram
Confirm your email address to activate your dashboard access
Enable two-factor authentication (2FA) for account protection
Assign role-based access to other team members if needed
Ensure account credentials are securely stored and not shared

OxaPay: KYC-free crypto payment gateway

Generate and Configure Your Merchant API Key

To begin your crypto payment integration via API, you must first generate a Merchant API Key. This key defines how your payment system behaves—such as accepted coins, branding, invoice handling, and more.

Go to the Merchant API section in your OxaPay dashboard
(You can use Oxa Light to quickly find the Merchant API page)
Enter your merchant name (3–30 characters)
Choose your accepted cryptocurrencies (or select all)

Advanced Configuration Options

Enable the features your business needs:

Set Underpaid Coverage (e.g. accept payments with small shortages – 0% to 60%)
Toggle Fee Paid by Payer if you want customers to pay transaction fees
Turn on Auto Convert to USDT to automatically stabilize received funds
You can also activate Auto Withdrawal to send funds directly to your wallet
Mixed Payment allows customers to complete their payment using more than one coin — enable this if your business supports it

Callback and Messaging Settings

Add your Callback URL to receive payment status updates
(Optional) Add a Description to tag this API key internally
Customize the Thank You Message shown after payment
Set a Return URL where users will be redirected after success

Branding and Theme Settings

Upload your Light Mode Logo and Dark Mode Logo
Choose the Default Theme Mode (Light / Dark)
Define your Organization Color (hex color code)
Finally, click “Generate Merchant API Key”
Save your key securely — you’ll use it in every API call or plugin setup
Three arrows diverging to represent different crypto integration paths

Choose Your Crypto Payment Integration Approach

Once your Merchant API Key is ready, it’s time to decide how your website will use OxaPay to accept crypto payments. OxaPay offers multiple integration paths to suit different business needs and technical environments.


Option A: Plugin Integration (No coding required)

Best for platforms like WooCommerce, WHMCS, Blesta, ClientExec, PrestaShop, and more.

Install the official OxaPay plugin for your platform
Paste your Merchant API Key into the plugin settings
(Optional) Enable sandbox mode for testing before going live
Save and test with a real or test payment

🧩 Use this method if you want a quick, no-code setup with full functionality.


Option B: Direct API Integration (Flexible and full control)

Best for e-commerce stores, marketplaces, SaaS platforms, subscription services, mobile apps, and custom websites that need full control over their crypto payment API integration.

Assign this setup to your development team
Use your Merchant API Key to create invoices, receive real-time updates, and manage payment flows
Choose one or more of these API-based payment structures:
Invoice: Generate a secure payment link per order
White-Label: Handle payment inside your own UI
Static Address: Assign fixed addresses to users/customers

Ideal for businesses that require:

Full UI/UX control
Custom payment logic
Multi-coin pricing and fiat display
Recurring or user-specific billing
Seamless integration with internal systems

📘 For full technical details, refer to the OxaPay API documentation.


If you don’t need a full crypto payment integration or prefer not to embed payments or develop anything, you can:

Use OxaPay’s Payment Link feature inside the dashboard
Manually create a link and send it to your customer
Track payment status in the dashboard

Note: This method doesn’t require API usage and is not ideal for automation.


Which One Should You Choose?

Business TypeRecommended Approach
WordPress / WHMCS / CMSPlugin
Custom Website / PlatformDirect API
Manual InvoicingDashboard Payment Links

 Once your approach is selected, continue to the next step to implement your chosen method correctly.


Select and Configure Your Payment Structure

Now that you’ve chosen your integration method (plugin or API), you must decide which payment structure fits your business best—and configure its settings accordingly. This step plays a central role in your crypto payment integration, as it defines how transactions are handled and presented to users.


Best for: E-commerce stores, service providers, marketplaces, and one-time payments.

Generate a secure, time-limited invoice with a payment link for each transaction. Customers are redirected to a branded OxaPay-hosted payment page that shows amount, coin, QR code, and countdown timer.

Configuration Checklist:

Display invoice amount in fiat currency (e.g., USD, EUR)
Set invoice expiration time (15–2880 minutes)
Define underpaid tolerance (0–60%)
Let the payer cover the network fee by activating the “Fee Paid by Payer” option
To avoid holding balances on OxaPay, enable auto-withdrawal to your wallet
Stabilize incoming payments by turning on auto-conversion to USDT
Mixed payments allow users to finish a payment with another coin — you can enable this feature if needed
Set a callback URL to receive payment status updates
Add a return URL to redirect customers after payment
Customize metadata: customer email, order ID, invoice description, thank-you message

How to generate crypto invoices

B. White-Label Payments (For fully branded checkouts)

Best for: Web apps, mobile apps, SaaS platforms, or platforms that need embedded crypto payments in their own UI.

This method gives you complete control over the user experience. You fetch payment details (amount, address, coin, QR) via API and display them in your own design—while OxaPay handles the backend.

Configuration Checklist:

Choose the coin and blockchain network for each payment
Display amount in crypto or fiat, depending on your UX
Set the payment expiration time
Enable or disable:
Fee paid by payer
Underpaid coverage
Auto-withdrawal
Auto-convert to USDT
Set your callback URL for receiving real-time payment status
Add internal fields: customer email, order ID, invoice description
Show the returned QR code and payment address in your interface

How to Integrate a White Label Crypto Payment Gateway

C. Static Address Payments (For recurring or user-based models)

Best for: Crypto exchanges, iGaming platforms, subscription services, and any case where each user needs a permanent address.

You assign a fixed crypto address to each user or product. Users can make payments anytime, and you track them via dashboard or webhook.

Configuration Checklist:

Select the coin and network for each static address
Assign a unique address per user or per purpose
Enable:
Auto-withdrawal
Auto-convert to USDT
Attach a callback URL to monitor activity on that address
Add metadata: user email, internal ID, or custom tag
Monitor balances and deposits manually or via webhook

After selecting and configuring your structure, you’re ready to test the flow and activate your integration.

Integrating Static Crypto Addresses for Businesses


Set Up and Validate Your Callback (Webhook)

Once your payment configuration is ready, it’s time to ensure your system can receive real-time updates from OxaPay—such as when a payment is completed, underpaid, expired, or confirmed. This is done using a callback URL, also known as a webhook.


Why This Step Matters

Without a valid callback, your platform won’t know when a user has paid. This could lead to:

Unconfirmed orders or services
Manual monitoring of transactions
Delayed user access or fulfillment

A working callback ensures automatic updates and order status changes.


Callback Setup Checklist:

Define your callback URL (e.g., yourdomain.com/payment-status)
Make sure your backend system is ready to receive POST requests from OxaPay
Ensure your system can:
Parse the received payment data
Update the correct order or user record
Respond with 200 OK to confirm receipt
Assign someone from your dev team to test the callback with sandbox mode
Use track_id or order_id in your own database to match transactions
Keep a log of received webhook events for auditing or troubleshooting
Review webhook signature (optional, for added security)

Once your callback is functional and verified, you’ll have full visibility and control over incoming payments—without needing to manually check anything.

Set Up OxaPay Webhooks for Payments in Real Time


Test the Entire Payment Flow Using Sandbox Mode

Before going live, it’s essential to test every part of your crypto payment integration in a safe environment. OxaPay provides a sandbox mode that simulates real payment behavior—without sending real crypto.

This helps your team verify that everything works as expected, from invoice creation to callback handling.


What You Can Test in Sandbox

Invoice generation and payment page display
Payment expiration and underpayment behavior
Auto-withdrawal and USDT conversion settings
Callback (webhook) delivery and response logic
Return URL redirection after payment
Handling of mixed payments (if enabled)
Status updates for: paid, confirming, expired, underpaid

Sandbox Testing Checklist

Activate sandbox mode in your API or plugin settings
Perform at least one test for each type of payment structure you use:
Invoice-based
White-label
Static address
Confirm that:
Webhooks are received and handled correctly
UI behaves as expected at each stage
Your system updates order/user statuses accurately
Log all test transactions and share results with relevant teams
Review errors or mismatches and fix them before going live

Once all tests pass successfully, you can switch your environment to live mode and confidently begin accepting real crypto payments.

Gear and shield representing security in crypto integration

Apply Final Security Settings and Access Controls

Crypto payments involve real assets—so your crypto payment integration must follow best practices for access control, key protection, and transaction authorization. OxaPay gives you all the tools needed to secure your integration.


Security Checklist

Enable Two-Factor Authentication (2FA) for all accounts with access to the dashboard
Restrict API usage by IP address to prevent unauthorized external calls
Use separate API keys for:
Merchant (payment generation)
Payout (withdrawal actions)
Never share your API keys in public repositories or frontend code
Store keys securely in environment variables or a secrets manager
If using auto-withdrawal, confirm the wallet address is correct and under your control
Periodically rotate API keys and update them across your system
Review and limit dashboard user roles and permissions
Keep an internal log of who has access to keys and where they are used

Once your security setup is complete, you’re ready to switch to live mode and begin processing real payments with confidence.

Payment API Security: Best Practices for API Key Security


Monitor Transactions and Analyze Payment Performance

Once your system is live, continuous monitoring and visibility over your crypto payments are key to ensuring operational success, identifying issues, and supporting users effectively.

OxaPay provides real-time dashboards and filtering tools to help you track every transaction and analyze trends.


Monitoring & Reporting Checklist

Regularly check the OxaPay dashboard to view payment statuses and trends
Use filters to search by:
Coin, network, or currency
Date range or specific time periods
Invoice ID, user ID, or order ID
Status (paid, expired, underpaid, confirming, canceled)
Monitor key metrics such as:
Volume per coin or currency
Success rate of invoices
Payment completion times
Underpaid or expired frequency
Export reports regularly for:
Financial and accounting review
Customer support and reconciliation
Business intelligence and KPI analysis
Ensure the finance or operations team has access to view/export data
Track system behavior after updates to the API or plugin

With real-time access to accurate transaction data, your team can react quickly, resolve issues fast, and make informed decisions to optimize performance.


Go Live and Finalize Your Crypto Payment Integration

After testing, configuration, and internal approval, you’re ready to switch from sandbox mode to live and begin processing actual crypto transactions on your website or platform.


Go-Live Checklist

Switch sandbox mode to live mode in your API calls or plugin settings
Double-check your live API key is correctly configured
Perform one small real transaction to verify full flow
Ensure all callbacks, order status updates, and notifications work as expected
Confirm your wallet address is correct (for withdrawals)
Inform your support and finance teams that live payments have begun
Monitor the first few payments closely for any unexpected issues
Update your documentation and internal wiki to reflect the live environment
(Optional) Announce crypto payment availability to your users or customers

Once live, your business is officially ready to accept crypto payments via OxaPay—with flexibility, full control, and no KYC barriers.


Final Crypto Payment Integration Review

A successful crypto payment integration with OxaPay through API is more than just a technical setup—it’s a strategic upgrade. It gives your business full control, real-time visibility, and seamless scalability without KYC/KYB delays. By following this checklist, you ensure a secure, customizable, and automation-friendly payment flow tailored to the way your platform operates.


Ready to Launch Your Crypto Payment System?

Start building your crypto-powered payment infrastructure with confidence:
🔹 Create your free OxaPay account
🔹 Explore the full API documentation
🔹 Need a faster start? Browse our payment plugin integrations

No paperwork, no delays—just seamless, secure, and scalable crypto payments for your business.

Share this article
Shareable URL
Prev Post

Understanding the Difference Between Invoice and Payment Link

Read next